Tuesday, December 13

Re-organising, re-uses

Evidence of destruction. 
Since my return to a near fully-wrecked garden, I've been thinking of ways to reorganize my plants and also to 'pet-proof' them. Part of my thoughts on these were on husband-proofing them and I believe I might have found a partial solution.

I have to admit a friend of mine gave me the idea - creating terrariums, which are basically enclosed mini-gardens. They are particularly helpful for the busy and forgetful (not to mention, my husband) - because they are mostly enclosed, moisture is kept within the terrarium so we don't have to water it very often.

My attempt at creating a terrarium.
There are obviously a wide selection of plants to choose from when building our terrarium and I will share more on this in my next post. Today I just want to share photos of my latest potting attempts. I've placed them all around the house and they are heavy enough to stop the kitten from turning them over.

Having a mix of different plants in shallow dish.
I realized the key in this is having small stones in your container to weigh it down. In my top picture, you may have noticed that one of my earlier attempts at planting in a shallow glass dish had been overturned by the kitten. I've noticed that he hasn't succeeded with the stone-weighted one. Fingers crossed but I hope he continues to leave them alone.  


Putting the vase to use as plant pot.
I add charcoal in the mix because I find that they not only act as a nice filter for excess water, they help with water retention. I also like using charcoal because an NEA officer once told me that water that's been filtered by charcoal is less favored by breeding mosquitoes. So far, it's worked.

I think I particularly like the mini terrarium I've built using my vase for cut-flowers. I don't usually get cut flowers now that I have my own garden so the vase had been sitting on my shelf for a while. I think having the plants in it make it look great and these are just some ideas we can consider as we start decorating our homes for year-end festivities and the new year.

The great thing about having our home-built terrariums as decoration is the fact that it is totally green! It's living and will stay with you for a long time. Hope you will check in again for my next post on how to build our own terrariums and the kinds of plants that will fit this kind of environment.

Monday, December 12

Ideas from Taipei

In my last entry, I said that I would share a couple ideas I got from my short trip to Taipei. I was surprised to see how "green" that city was. Most of the corners I turned, I could see houses and shops with potted plants. Many of the apartments also had plant-decorated balconies, although the plants were primarily placed on shelves and in the usual plant pots we see here. 

A metal cat sits at the doorway to a teahouse. Love the plants that surround it. 
There were some places were the usage of green really popped and caught my attention. I didn't manage to catch all of these examples but here are some... 

Pruned bamboos.
On our trip up to one of the mountains and getting thoroughly lost while trying to find a lake, I spotted this building with its stunning bamboo plants. Made me wonder how they pruned the bamboo such that it has this shape. 

Another day trip to one of the popular touristy locations brought me to a public washroom, where I was pleasantly surprised. They have obviously tried to maintain a wall of greens within the washroom. 

Although you'll have noticed that most of the plants are missing and it doesn't appear that the plants are getting much sunlight, the remaining plants look quite healthy and happy.  This layout of plants is one of the ones I've been working on lately. Remember one of my posts where I shared a picture of plants in frames? 

The other thing I noticed from this trip lies in the selection of plants. I've done a bit of homework since and I suppose most of you may already know this - some plants are just more suited for the low lighting indoors. Those might be the plants to consider if you're also planning to have plants as indoor decorations. 
A wall of plants in a public washroom.
That being said, I've been taking a long break, what with the dreadful cold and cough I developed during the trip. And my mind hasn't been idle. With various festivities coming up, I guess decorating our house to receive guests may be top on our minds. I'll be sharing some of the ways I've transformed the containers lying around my house and how discuss how you might want to consider using them to decorate your house for the rest of the year and the next year.


Saturday, December 3

The last time I blogged...

I have to apologize for the lapse since my last entry. I've been away to Taipei and since then, been nursing a cough that just won't go away.

Notice how most of the branches are droopy or are nearly broken off 
I left my garden to my husband and came back to find that it's now nearly barren -- he made the same mistake as I did many years ago of assuming that nature will take care of the plants since it's been rainy and killed off half my plants. Those that did survived have been prey to my playful kitten.

This is how some of my plants look like now >>

I do have positive news though. My compost project is going well - it is completely devoid of smell and the recycled vegetables, paper and coffee/tea are browning very nicely. Do watch out for my photos, which will be posted soon!

I will be posting another entry soon about planting from scratch - I will be starting an "edible garden" out on my balcony and all the plants will be grown from seed.

Meanwhile, I am hoping to recover enough to clear up the mess on the balcony.....

Saturday, November 19

Things you wanna keep out of the compost

In my last entry, I discussed the kinds of items to be included in the compost. In fact, I found a whole list of bizarre things that can be included in the compost, ranging from pet fur to road kill (not quite applicable here, unless you're talking about the poor animals that mysteriously end up dead on the PIE...). Today, let's talk about things we want to avoid having in our compost.

Since the whole reason why we want to compost is so we know exactly what we're feeding our house herbs and food plants with, it might defeat the purpose a little to include the following:

1. Tissue with our/someone else's mucus. This may sound a little obvious, but since tissue is one of those paper products that we can include in our compost, I imagine when we're collecting stuff to recycle, we might just include one of these by accident. Do be careful, because we don't want to be feeding our compost viruses!

2. Leftover meat (either cooked or raw). The C-project described here is meant to be an indoor endeavor.  So meat products are a big no-no. Not only are they slow to compost, they might attract the wrong company with bad odors. So if you're thinking of composting leftover food, make sure you filter out those meat.

3. Pet poop. For the same reason why we want to avoid mucus-covered tissues, we want to avoid poop. Adding them to the pile only brings you more complications, in the form of bacteria and parasites, to name a few. There's also the matter of hygiene - my compost bin is right by my kitchen sink, so I wouldn't want poop anywhere near where I am handling food.

4. Diseased anything. There are many sites that advice against including diseased plants. I know it's tempting to just include those greens that used to do so well in your garden. But, if including them makes it impossible to use your compost soil for your new plants, I think it's better to just avoid them.

There are many other things that different sites and books recommended excluding from our compost. I think as beginners in indoor composting, we should avoid all things that are known to smell. If you have your compost in your kitchen, another thing to avoid would be having items that breed or contain bacteria around. I guess if we followed all these precautions, our composting project should be a fun one!

Here's a list of the sites I referred to while preparing this entry...
>> 22 things you didn't know you could compost, WebEcoist
>> 7 things you should never compost, Veggie Gardener
>> How not to compost: 10 things to leave out of the bin, Planet Green

Tuesday, November 15

The stuff that becomes "gold"...

Now that we've got our compost bins and we're all ready to start on our home C-project, the next question really is - what do we compost? Most sites and books recommend starting a compost pile either with worms or compost soil, which can kick start the composting process. I chose to have compost soil (since I happen to have them) instead of worms for this project.

Egg shells, garlic skin, carrot peels & Ti Wang Choy ends.
Most families in Singapore tend to have pretty much all their meals out; cooking can be an infrequent affair. I also find it challenging to have to prepare all my meals at home especially when work hours get hectic. If we didn't have to cook for the pets, I doubt we would have much to compost. As it is, we have lots of potato and carrot peels, sometimes veggie-roots, and egg shells for recycling.

For our C-project, here are some of the things you can include and hope it becomes "gold" in your compost:

Potato, carrot peels, coffee & tea.
1. Veggie scraps - in the form of peels or ends. I filled mine up with potato and carrot peels on the first day. Today, I topped it up with garlic skin, more carrot peels and Ti Wang Choy ends.

2. Egg shells - The important thing to note when adding these shells in our home compost is to make sure we wash them clean and crush them first. Egg remaining in the shell is likely to start stinking. If you have a small kitchen like I do, I would want to make sure those shells are clean before they go anywhere near the pile...

3. Tea leaves or coffee grinds - One of the articles I referred to on Gaiam life, Can I compost this? lists tea leaves as green materials and coffee grinds (including the filter) as brown materials. Both contribute differently and we should bear in mind the kind of green vs. brown proportion we want (roughly 50-50). If you're a heavy tea drinker and lighter on the coffee, you might want to ask for some from friends who have coffee grinds or seek out alternative brown materials for your compost.

4. Peanut shells - I think this is something most household would have, especially around Chinese New Year. This is excellent brown material and the next time you have a party where peanuts are served, save the shells!

5. Newspaper & cardboard - Newspaper and cardboard are considered brown materials and need to be shredded before they get added to the compost pile. You might not want to have a compost full of newspaper but adding some of these dry materials will help with the smell and can be used as "bedding".

These five are materials that I imagine we come into more contact with. Another material could be flower clippings from floral arrangements or even flowers that have withered. I would be cautious about adding flowers that have been dyed, but other than that, they make a good addition to your compost.

In my next entry, I shall talk more about what NOT to add... Do watch out for it!

Here's a list of some of the sites where I got my information from...
>> Compost This! What to put in your composter @ Gaiam Life
>> Composting at home with Ohio State University 
>> Indoor composting tips and techniques @ compostjunkie

A mini compost bin for home

The other day during a dinner date, a friend of mine managed to plant an idea in my head - since I am so into planting herbs and other edibles, why not start composting too? Having my own compost soil makes it clear the kind of nutrients I am feeding my plants. 

All you need to make your mini compost bin.
Like many people, I knew what composting involved but had many misunderstandings about the actual process. One of the biggest being that it will stink real bad...

I have to admit my first encounter with compost was back during my university days. My landlord had a big compost out at the side of his house and as tenants, we were encouraged to try recycling bits of food that we normally just discard. It helped that he had this nice big sink that captured a lot of stray food. It made it easier to dump our veggie peels in and take it out to the good old compost. It was my first real encounter with the recycling of raw materials and I was quite happy to learn more about how I can help stay green. 

The kitten is optional. 
The only issue I had with composting was the stench. I am not sure how many delicate noses there are out there, but I am sure that the last thing we want in our homes is a permanent stench of rotting food... So before I plunged headlong into my own compost project, I made the effort to do a bit of research.

I found that there are many other like-minded people who started their composting projects long before I did and have been really doing their part to help get others on their way. One such group is composting in Singapore. They share ways we can make our own large compost bins and tips on how to de-stench them so the bins can sit nicely out along the corridor.  

For my project, I wanted to go small. Sometimes, we don't have corridors for large compost bins or simply find it too troublesome to get the leftovers out of the house and into the compost. I know I certainly find composting less appealing if I need to bring my damp food or tea out. So I figured a bin that fits my kitchen counter top would probably work best for someone like me. 

My idea for the bin came primarily from the tips on ehow.com, How to make an apartment composter, but with a few modifications. The items needed to make the compost bin are as follows: 

Plan where to drill on the bin cover.
-- A small bin in the color you love best and a size that will fit your kitchen countertop
-- Plastic cat spikes (that don't work at preventing my kitten from trampling all over my plants)
-- Multi-purpose mesh & wire
-- Wire cutter, an electric drill, and a pair of scissors

After the drilling. 
 First you will want to drill enough holes in your bin so that the air can circulate well. This is quite important because if your compost stays cooped up, chances are the stench will really build up and get released in a big puff of toxic cloud.

Ok, maybe I am exaggerating. Anyway, for my project, I've decided not to drill holes in the base of my bin because I want the liquid to be trapped in it and not dripping out. This makes it necessary to go on to the next step, which is to prepare the cat spikes. They go in the base of the bin and help drain the compost while making sure it gets sufficient air.

Placing the spikes at the base of the bin.
The last thing I do is build a net using the multi-purpose mesh and wire. I decided to go with a square net because the bin I am using has short spikes at the spine of the cover to support the net. The making of the net is actually the most tedious part of the project but I am glad I tried! The end product is a net that can be lifted out of the bin so that we can easily rinse the liquid that gets trapped at the base of the bin whenever we feel it necessary.


There is obviously so much more to improve on but I think for a first try, this was not too bad. I guess what's more important to me is, have I succeeded at making composting more appealing to you?

In my next entry, I shall be sharing more on what goes into your compost and also, what NOT to place in it... 

Sunday, November 13

The mini pesticide experiments

Ever since I started this project of tracking down small food plants to grow at home, the next challenge I've had to face is the safest way of curbing the insect population, which also feed on our food plants. In my previous posts, I shared how caterpillars, aphids and mealy bugs can harm our plants, but also how insecticides wrongly applied can harm your children or pets. This got me started on ways we can make our pesticides using materials we know are safe.

Using canola oil, baking soda & soap.
The recipes I tried out today are mainly from an article on natural garden pest control and the video I shared earlier by the Produce Garden. 

Recipe 1 - For insects & fungal diseases
This recipe required 1 tablespoon of cooking oil, 2 tablespoons of baking soda, and a few drops of soap in approximate 1 liter of water. 

All you need to do is measure out the ingredients, add water and mix or shake in a used container. You might want to have the end product in a spray bottle.

Canola oil & dishwashing soap for Recipe 2.
Recipe 2 - For soft-bodied insects (e.g. aphids & mealy bugs) 
This recipe required just 1 tablespoon of cooking oil and a few drops of soap in approximately 1 liter of water. Again, mix all your ingredients in the water and have it in a spray bottle. This is commonly sold in shops as white oil. 

To apply, spray it both downwards and upwards on your leaves. The oil makes it hard for the insects to survive. 

Ingredients for Recipe 3.
Recipe 3 - As a general pesticide
This recipe follows that featured in the video by the Produce Garden. It required chopped up chilies, garlic and soap. In the video, dried chilies were used but I chose to use the chili padi that were going bad. 

In my experiment, I used two small chili padi, one clove of garlic and approximately 1 tablespoon of soap. Having dumped the soap, chopped up chili and garlic into my bottle, I added warm water before giving it a good stir. This pesticide needs to sit a week before you strain the chunky bits out and transfer to a spray bottle. 
Chopped chili & garlic

I will be saving this pesticide for next week. Today, I tried the white oil on my curry leaves and pandan. I'm keeping my fingers crossed and hoping the pesticides work! The constant (but irregular) rain we've been having is making it hard to gauge just when the insects will come. 

I hope we all have fun making these pesticides to protect our plants from unwelcome guests. 

I will be talking about composting at home in my next entry. Do look out for it, especially if you've been thinking about having it at home but worried about the stench! 
The end product with messy labels.

Tuesday, November 8

Insecticides or home-made repellents?

One of the worries any gardener faces is the potential bug infestation. In urban gardens, this is an especially real threat. My apartment is located near the ground level. As a result, there is constant combat with the crawlies. I also worry about whether having a plant in my living room is going to attract nasty aphids or mealy bugs in addition to the ants parading in my flat. It would be easy to turn to commercial insecticides for most gardeners and in fact, there are many such products readily available.

Insect spray available in supermarkets. 
The kind of selection found in nurseries.
Things get tricky when you are a budding gardener and also a pet owner. What previously feels like a wide selection of insecticides for your plants may suddenly narrow down to... nothing.

I also went through this debate and used to think that anything will do if my plants are hung high enough, or if I spray and make sure the pets don't go near the plants till it's dried. That is until I realised that I have a herbivorous cat. Her avid plant-chewing habits forced me to look for products that are pet-safe. I am thankful that the white oil serves just this very purpose. They are generally human and pet-friendly but effective in saving your plants from nasty bugs. Wiki lists it as a home-made insecticide and in my next entry, I shall be discussing the different types of insecticides you can try concocting at home.

A handy & pet-safe insecticide.

For now, if you are just a budding gardener and want to do no more than to see your plant sprout and your flowers bloom, go the easy and commercial way with insecticides. But do make sure to choose one that suits your household, be it one with herbivorous pets or inquisitive young children.

Tuesday, November 1

Guests in your urban garden

A while back when the weather here in Singapore was much sunnier, I was lounging around with the dogs and thinking of ways to 'insecticide" the plants on my balcony while keeping it safe for the pets. My cat, in particular, loves young shoots, new leaves. It's insane how much her chewing habits resembles that of a panda, actually. I am crying a little here as I recall the recent damage she's done to my bamboo.

But I digress. That sunny afternoon, I was thinking of the problems I'd encountered with some of the insects. The aphids and mealy-bugs were clearly guests I can do without. As I was thinking and semi-admiring the plants, I noticed a beautiful butterfly flitting from one flower to the next. I'd had moths and wasps hovering around some of my plants before but never a butterfly as pretty as this one. I remember excitedly pointing (in vain) at the butterfly and attempting to direct my dogs' attention to a beautiful sample of nature right at the balcony. I really regret not taking any photos of the beautiful thing; I should have because it would have been a nice memory of what I thought was a very welcome guest.

A couple days after the visit, I noticed a couple of my plants "balding". I naturally assumed that my cat'd been helping herself to the green buffet and was too lazy to do a thorough check till the weekend. By then, my mint and basil had been cleanly devoured and was bald beyond the point of no return. It was then that I noticed the guest I so welcomed earlier in the week had left a very unwelcome present for me - at least two caterpillars!!

The only evidence left of my unwelcome guest
In the end, after a big fuss and much horror, I had help removing the caterpillars and this time, bothered to find my camera for a picture. There were actually two different kinds of caterpillars living among my plants and if you find this green one gross, you'd have freaked at the sight of the other brown ones; deceptively dead-looking but very much alive. I've been trying to actively suppress my memory of the brown caterpillars since...

I definitely learnt a big lesson here: Beauty really comes at a cost. I paid two of my plants for a 5-second glimpse of beauty in my garden. Do you think it was worth it?

Somehow, I doubt I will ever see butterflies with the same joy again....

Friday, October 28

The Rain

It's been raining unpredictably lately and I've just been stressing over whether my newly potted plants will survive this wet spell. Just wanted to share that the rainy may appear to be a friend but can, to lazy amateurs like me, be a greater foe!

My balcony has an open roof-top and whenever it rains, it feels like it poured. Being the complacent beginner that I was, I assumed that my plants would be drinking enough and I didn't have to water that much. I was also worried that the roots would rot more than they would dry. Never was I so wrong. Within a couple of days, two of my best greens dried out, despite the heavy downpour just that very day. Not all my plants died because as it turned out, some had better access to the water.

One big warning for me: Just because Nature's watering doesn't mean I can neglect. So fellow urban gardeners, if you have a balcony just like mine and are considering letting Nature do its job, do consider doing yours too and check those greens of yours before it's too late!
Summertime Blossoms. Can you guess from where?

Tuesday, October 25

All you need to pot a plant

These photos were, again, taken at night. A big thank you to my friend who stayed & took them for me while I occupied myself with the plants.

Here're the items I used for re-potting:
Organic compost, my hand shovel & pair of scissors, Japanese loose tea bags, medium-sized kitchen bag, the plant I intend to re-pot and my new container from Ikea.

Trimming the kitchen bag. 
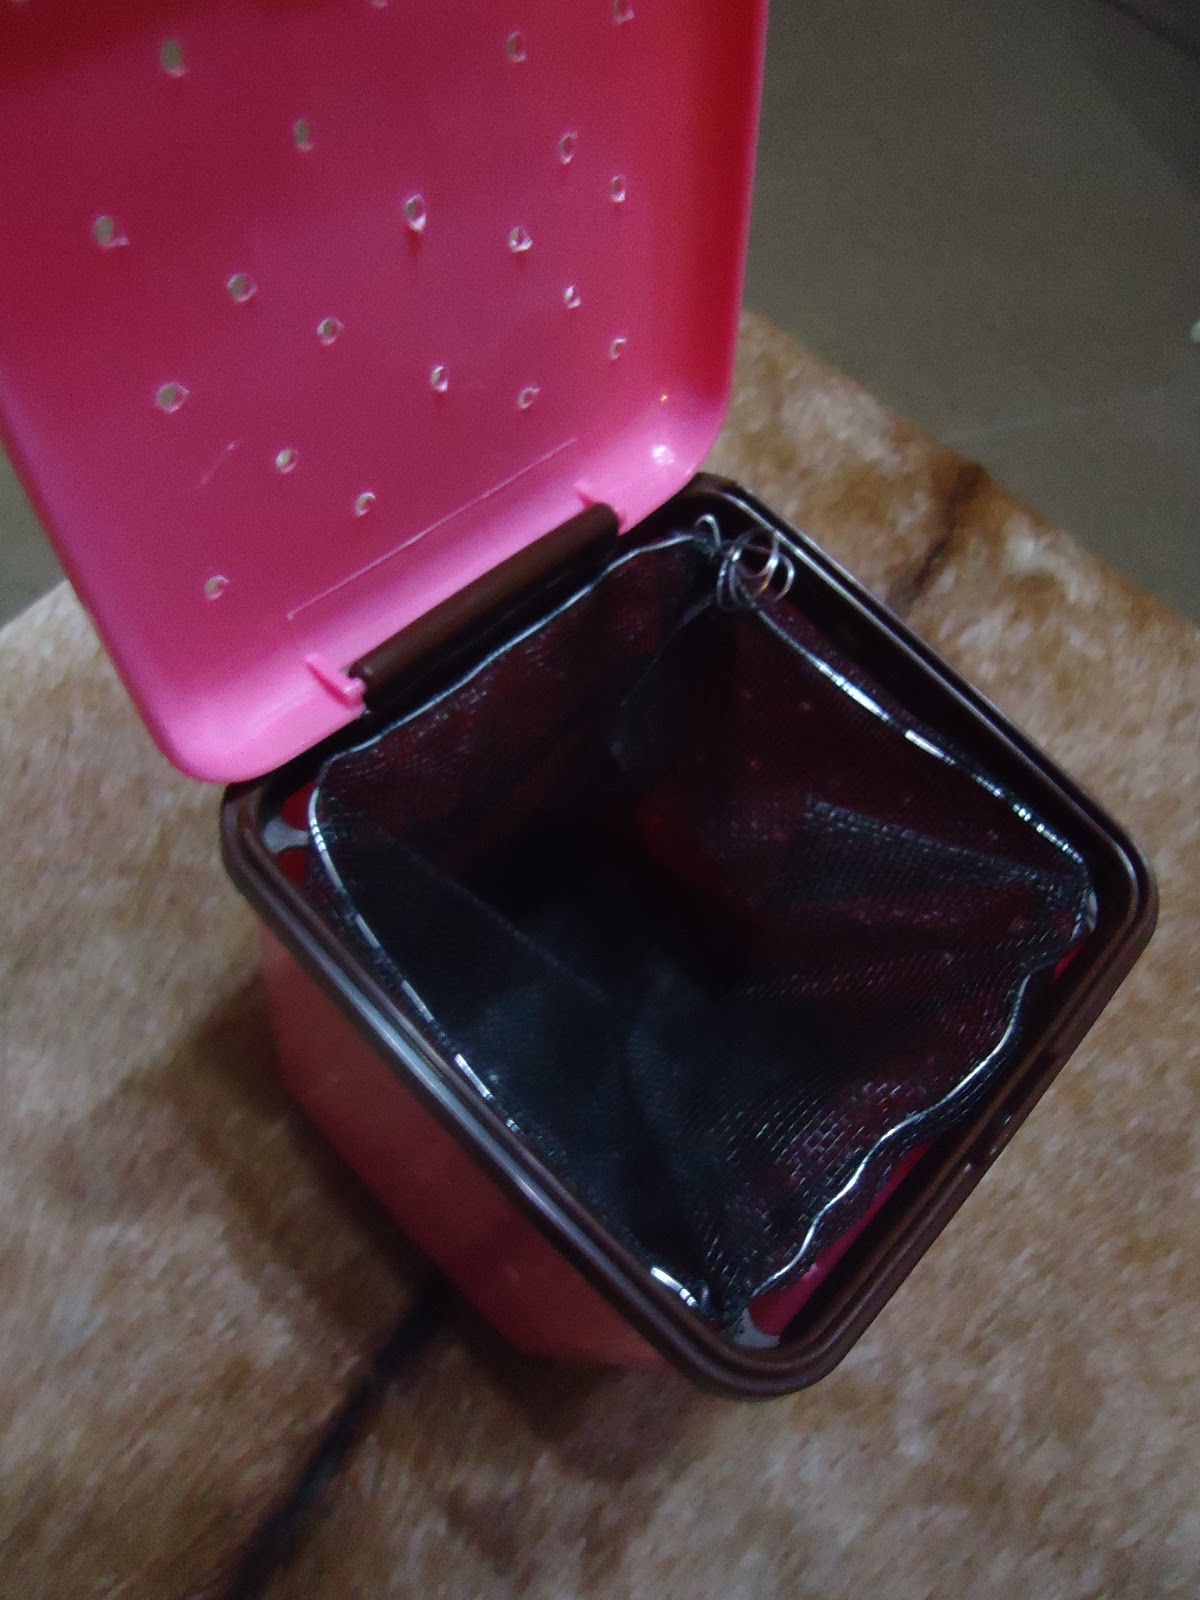
Ripping the tea bag and laying it flat.
First, I trim the bag so it fits nicely in the container. Then, I poke a few holes at the base of the bag and use it to line the container. Then I prepare to line the base with the tea bag that I've ripped open. I use it as a base, primarily to minimize the loss of soil while ensuring that excess water can drain easily.
This is what the base of the bag should look like after it's lined with the tea bag. 
I start filling the bag with soil once the prep-work is done. I usually use a mix of potting soil, compost and the mixed soil I get from nurseries. You might want to research the type of soil your plant favours. My orchids tend to have little to no soil - I use just charcoal because orchid roots are sensitive to the amount of water they sit in. Too much and they start rotting.
Filling the bag with soil. 
This time, I am re-potting the false heather I bought from Ikea. The plants you get from nurseries, supermarkets and Ikea usually come in unattractive plastic pots. Some people choose to keep the plants in those pots and place them in more decorative ceramic pots. I usually re-pot mine, primarily so they have a bigger space to grow and also because I like having more than one type of plant in each pot.

Placing the heather to the left of the pot.
I've trimmed some branches off my lemon-balm and in the picture, you'll notice that I've cleared off most of the leaves, leaving just some at the top and a nearly bare stem. These stems are then inserted into the soil. Once they're where I want them to be, I place them in the sunniest spot of the house and wait for those lemon balm to take root and the false heather to adapt to its new home.
Newly potted greens
If you're adventurous and would like to try growing a plant from seed, just be sure to follow the instructions given at the back of the pack. Seed packets are sold in all supermarkets that have a plant section and of course, in the nurseries. They usually feature a picture of the plant in bloom or with fruit and clear instructions on care for the plant.

A periwinkle seed packet. 
The seeds come in a sealed packet. 
Here I have a sample of periwinkle seeds. The outer package is usually paper while the seeds are contained in a sealed bag within. If you have a bag of seeds but don't intend to plant all of them at once, make sure you seal the inner bag again. Otherwise, you'll find it hard for your leftover seeds to germinate when you eventually decide to plant them.

Gardening can be as easy or as tedious as you want it to be. If you're an amateur like me, there's no harm in starting out simple!

Potting plants

We shifted into our current flat nearly two years ago. Before the move, I'd re-potted my Indian rubber plant in a super big pot and placed a few of my small cacti at the base, along with the zig-zag. My rationale had been to make use of the moving service and save myself the hard labour of shifting a huge plant. It worked. My Indian rubber grew and it was really only a couple months ago that I realised it's supposed to be a tree. Very intelligent, I know. But since I'd also seen this plant in a nursery being shaped as a big "bonsai", I decided to saw off its branches the other day. I'm hoping it'll still thrive and I get to cultivate it as a home-plant. 

A picture of a baby bird we saved (which unfortunately didn't survive) with my bonsai as a backdrop. 
A restriction I set for myself when I shifted into the new pad was avoid making holes in the walls, no matter the purpose. But I am always tempted by those hanging, draping plants and was aware that orchids grow best when hung. Within months, I caved in and hammered a hook out on the balcony. I remembered it was the beginning of the year and the morning sun shone into the right of the apartment. I stupidly forgot that the location shifts as the year progresses and decided to place the hook in the rightmost corner, where I assumed the plant would be able to get max. morning shine. Within weeks, it shifted and the left of the balcony had most sun. My orchid (the white one I featured in a previous entry) grew really sad and withered. I've not placed any hanging plants there since and decided that I am not going to get any plants that need to be hung. 

I am glad that I had excess containers from IKEA that were under-utilised. I decided to make use of them to re-pot my dying herbs. They are so nifty and I can hang my plants virtually anywhere now, without making any holes in the wall. I've been posting pictures of these containers so I won't include one here. But do check my next entry on how I pot my plants in them. 

Monday, October 24

Weekend of rest

Had a pretty long weekend to plan and think about the plants to be potted in my new containers! Will be sharing how I plant my greens and herbs in the next entry.
Meanwhile, I'm keeping my eyes wide open for more plants that are suitable as HDB greens...
A new pot of plant. Taken at night from the kitchen window.

Friday, October 21

Plants for everyone

I never thought myself as having a green thumb but I guess perseverance works. I can't tell you how many times I've excitedly bought a pot of healthy looking herb, only to have it die on me weeks later. Most of the time, I just can't figure out how much water the herbs should have. If I get rosemary, for example, will it wither in this tropical climate? What about mint? Or basil? Most of my herbs usually end up looking sad and covered by mealy bugs when I water them frequently. When I decide that maybe too much water is bad, they wither on me. I just never managed to find a way to get them to survive. 
Out of desperation and necessity, I suppose, I decided to re-pot four of my dying herbs in two containers from Ikea. These plastic containers were meant for drying cutlery and had handles which allow me to hang them off my kitchen rail. The holes at the base of the container made it perfect for excess water to drain from the soil. I've always had the idea that I wanted to have pots of herbs right above my kitchen sink so that I could access them easily when I cook. So I was so happy that this wish was going to materialize.
But the challenge was in making sure they would survive. I decided that having a clear plastic bag and a tea bag contain the soil and plant would make it easier for me to track how wet the soil was. Because the water could easily drain out and I had them in the kitchen above my sink, I didn't have to worry about the excess water making a mess.
I am so glad I tried. In the end, I've had to move them to the kitchen window where they can get more sunshine but my basil and mint are so happy now, they're thriving. My oregano and rosemary combi-pot is also doing very well. It just shows that even for the very amateur, with the right pot and right way, our plants can do really well.

My thriving pot of mint & basil from 4 short branches snipped off the mother plants.

Thursday, October 20

A twirl around the B

Thanks to a friend, I managed to get some shots of the plants around my balcony (my camera is permanently resting, thanks to the healthy chewing of my JR terrier). These photos were taken at night and I made use of an app she had to create different effects.


This is one of my favorite. I recently re-potted the plants around my increasingly cluttered balcony and decided to pot all the bamboos together. What you see here is the base of my latest bamboo addition: the Bambusa oldhamii. It's surrounded by two smaller varieties: the Punctulata Draceana and the Spotted Draceana. They are known locally as Japanese bamboos although they are considered as succulent plants. I picked up my Punctulata from a pot my neighbour threw out. The spotted was my first successful 'accident' from leaves that were meant to be discarded after a floral arrangement for a wedding.

This is my curry plant. We had a scare earlier this year - it was severely infected by aphids and looked on the verge of withering. Thankfully, spraying the white oil helped solve this problem and it's looking really healthy now.

Using a metal screen cheaply available from the Japanese shop, Daiso, I was able to hang my air plants and miniature orchid on the wall. The lizard is a momento from my trip to Barcelona, Spain and really reflects the mesh of colours I hope to eventually achieve on that wall. The spiky ball of tillandsia you see hanging somewhere in the center of the screen regularly blooms and provides a very lovely splash of red to the collection. If you are worried about your ability to maintain a potted plant, you might want to start with an air plant.

I am currently trying my hand at planting potatoes and pumpkin on the balcony. Will be sharing my experiences with herbs next.

Wednesday, October 19

Planting Indoors

 One of my very first attempts with an air-plant...
Taken when my white orchid bloomed again after 2 years of being barren! Unfortunately, this plant did not survive the move to my current flat. 
 One of the plants in the B&B we stayed at during a trip to Hakodate, Japan. The flowers were shaped like a lantern.
This was how they had their plants set up in Hakodatemura. A great way to have a variety of greens in a tight corner of your house.

Floral accidents

I've always found it difficult to head out to a nursery and be told that I am only allowed to get a single pot of plant. There are just too many plants at home and the poor balcony is too cluttered with my seemingly endless pots of greens. Yet, the nursery houses so many more varieties of flowers, herbs and greens I covet. Out of sheer desperation, I've kept with my single-pot-per-nursery-trip budget but started creating "accidents"; I snip short branches off plants I really like from the oddest places or uprooting some from their homes -- off the slope when I'm out for a walk with the dogs, from a bush just along the street, off the bark of a tree... 
The ferns always survive and actually grow to be giants. Some of the branches I snip off various bushes survive too. I collect leaves that are meant to be discarded after floral arrangement classes and am proud to say that the product of one such lovely accident (my spotted bamboo plant) is thriving. Sometimes, when neighbours throw out perfectly healthy plants, I pick them up and re-pot them too. So maybe they were looking a little scruffy when I found them but the one I last picked up is growing real well now and I have the plant in two different pots. It makes me happy every time I look at new shoots, happy leaves. One of my favourite accidents is the "lipstick" plant. I snipped off a branch outside my school library the year I started on my doctorate. It's been 5 years since and the plant is nearly one meter tall.
I recently finished rearranging the balcony plants and it looks so much neater. When I told my husband that I managed to save space for new plants, he gave me a very predictable look of incredulity. Nonetheless, I'm determined to forge on, create more accidents and work at turning my balcony into a very green space...


Flowers around the house

I'm obsessed with the idea of creating a very green space right at home and I guess this has gained an even greater priority since our move to a flat that faces the main road. We not only get to enjoy the fumes of the traffic daily, the sounds these vehicles and yelling drunks produce, the cigarette stench from passers-by has come too annoyingly close for any sort of comfort.
I do realise that I could opt to seal off the balcony like so many of my neighbours have done. Have solid sound-proof windows installed that I can shut at will. But I like my plants and would like to have my own "urban garden" right on the balcony. So while searching around online, I've found really nifty ideas on how to use plants as a shield for privacy, cut back the fumes and really filter out some of the noise.
I hope to share some of these attempts in my blog and convince more to consider having some green in their space too.