Showing posts with label HDB kitchen. Show all posts

Tuesday, November 15

The stuff that becomes "gold"...

Now that we've got our compost bins and we're all ready to start on our home C-project, the next question really is - what do we compost? Most sites and books recommend starting a compost pile either with worms or compost soil, which can kick start the composting process. I chose to have compost soil (since I happen to have them) instead of worms for this project.

Egg shells, garlic skin, carrot peels & Ti Wang Choy ends.
Most families in Singapore tend to have pretty much all their meals out; cooking can be an infrequent affair. I also find it challenging to have to prepare all my meals at home especially when work hours get hectic. If we didn't have to cook for the pets, I doubt we would have much to compost. As it is, we have lots of potato and carrot peels, sometimes veggie-roots, and egg shells for recycling.

For our C-project, here are some of the things you can include and hope it becomes "gold" in your compost:

Potato, carrot peels, coffee & tea.
1. Veggie scraps - in the form of peels or ends. I filled mine up with potato and carrot peels on the first day. Today, I topped it up with garlic skin, more carrot peels and Ti Wang Choy ends.

2. Egg shells - The important thing to note when adding these shells in our home compost is to make sure we wash them clean and crush them first. Egg remaining in the shell is likely to start stinking. If you have a small kitchen like I do, I would want to make sure those shells are clean before they go anywhere near the pile...

3. Tea leaves or coffee grinds - One of the articles I referred to on Gaiam life, Can I compost this? lists tea leaves as green materials and coffee grinds (including the filter) as brown materials. Both contribute differently and we should bear in mind the kind of green vs. brown proportion we want (roughly 50-50). If you're a heavy tea drinker and lighter on the coffee, you might want to ask for some from friends who have coffee grinds or seek out alternative brown materials for your compost.

4. Peanut shells - I think this is something most household would have, especially around Chinese New Year. This is excellent brown material and the next time you have a party where peanuts are served, save the shells!

5. Newspaper & cardboard - Newspaper and cardboard are considered brown materials and need to be shredded before they get added to the compost pile. You might not want to have a compost full of newspaper but adding some of these dry materials will help with the smell and can be used as "bedding".

These five are materials that I imagine we come into more contact with. Another material could be flower clippings from floral arrangements or even flowers that have withered. I would be cautious about adding flowers that have been dyed, but other than that, they make a good addition to your compost.

In my next entry, I shall talk more about what NOT to add... Do watch out for it!

Here's a list of some of the sites where I got my information from...
>> Compost This! What to put in your composter @ Gaiam Life
>> Composting at home with Ohio State University 
>> Indoor composting tips and techniques @ compostjunkie

A mini compost bin for home

The other day during a dinner date, a friend of mine managed to plant an idea in my head - since I am so into planting herbs and other edibles, why not start composting too? Having my own compost soil makes it clear the kind of nutrients I am feeding my plants. 

All you need to make your mini compost bin.
Like many people, I knew what composting involved but had many misunderstandings about the actual process. One of the biggest being that it will stink real bad...

I have to admit my first encounter with compost was back during my university days. My landlord had a big compost out at the side of his house and as tenants, we were encouraged to try recycling bits of food that we normally just discard. It helped that he had this nice big sink that captured a lot of stray food. It made it easier to dump our veggie peels in and take it out to the good old compost. It was my first real encounter with the recycling of raw materials and I was quite happy to learn more about how I can help stay green. 

The kitten is optional. 
The only issue I had with composting was the stench. I am not sure how many delicate noses there are out there, but I am sure that the last thing we want in our homes is a permanent stench of rotting food... So before I plunged headlong into my own compost project, I made the effort to do a bit of research.

I found that there are many other like-minded people who started their composting projects long before I did and have been really doing their part to help get others on their way. One such group is composting in Singapore. They share ways we can make our own large compost bins and tips on how to de-stench them so the bins can sit nicely out along the corridor.  

For my project, I wanted to go small. Sometimes, we don't have corridors for large compost bins or simply find it too troublesome to get the leftovers out of the house and into the compost. I know I certainly find composting less appealing if I need to bring my damp food or tea out. So I figured a bin that fits my kitchen counter top would probably work best for someone like me. 

My idea for the bin came primarily from the tips on ehow.com, How to make an apartment composter, but with a few modifications. The items needed to make the compost bin are as follows: 

Plan where to drill on the bin cover.
-- A small bin in the color you love best and a size that will fit your kitchen countertop
-- Plastic cat spikes (that don't work at preventing my kitten from trampling all over my plants)
-- Multi-purpose mesh & wire
-- Wire cutter, an electric drill, and a pair of scissors

After the drilling. 
 First you will want to drill enough holes in your bin so that the air can circulate well. This is quite important because if your compost stays cooped up, chances are the stench will really build up and get released in a big puff of toxic cloud.

Ok, maybe I am exaggerating. Anyway, for my project, I've decided not to drill holes in the base of my bin because I want the liquid to be trapped in it and not dripping out. This makes it necessary to go on to the next step, which is to prepare the cat spikes. They go in the base of the bin and help drain the compost while making sure it gets sufficient air.

Placing the spikes at the base of the bin.
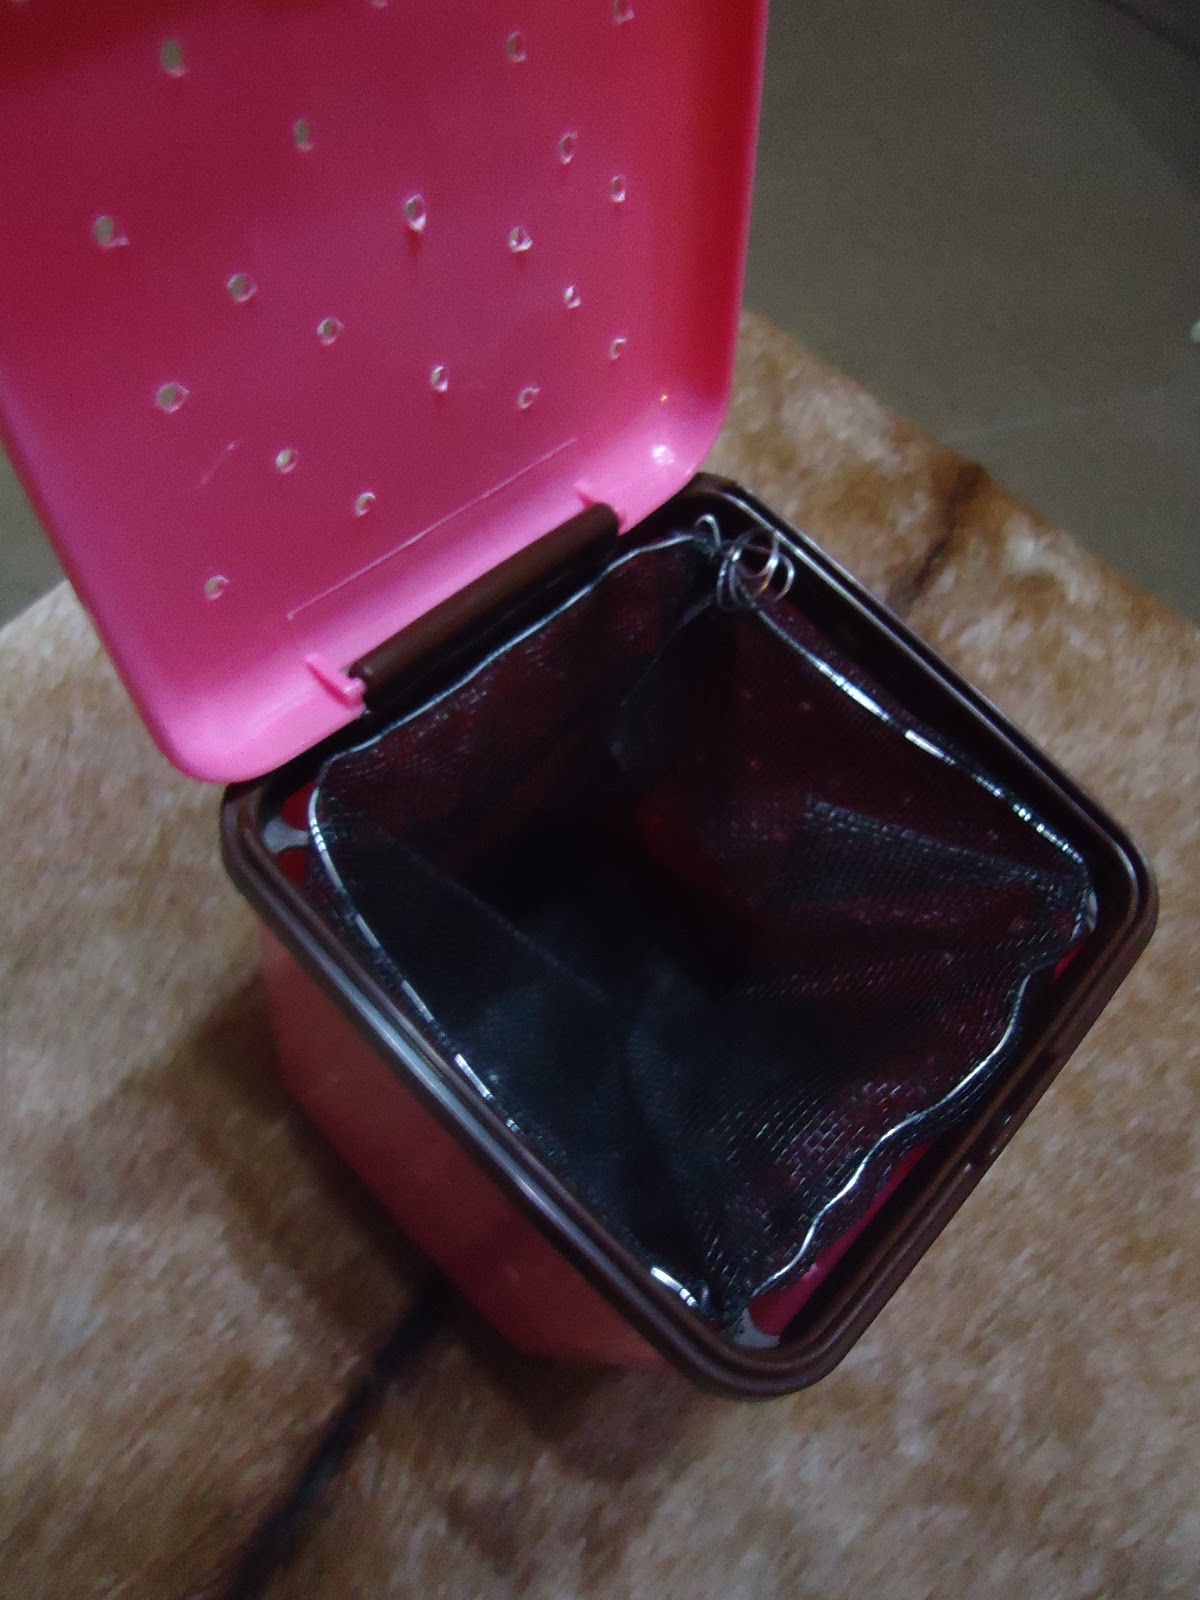
The last thing I do is build a net using the multi-purpose mesh and wire. I decided to go with a square net because the bin I am using has short spikes at the spine of the cover to support the net. The making of the net is actually the most tedious part of the project but I am glad I tried! The end product is a net that can be lifted out of the bin so that we can easily rinse the liquid that gets trapped at the base of the bin whenever we feel it necessary.


There is obviously so much more to improve on but I think for a first try, this was not too bad. I guess what's more important to me is, have I succeeded at making composting more appealing to you?

In my next entry, I shall be sharing more on what goes into your compost and also, what NOT to place in it...